Staying on top of email

By Thomas Weng on November 3, 2018
~1 min. read

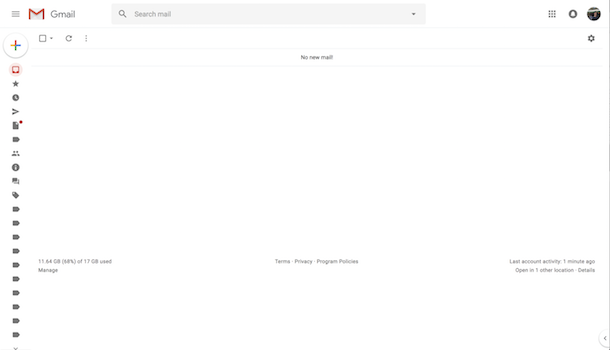
I find it hard to be productive when my inbox is cluttered with emails. It’s easy to lose track of high-priority tasks in a messy inbox.

Screenshot of someone's inbox from the Internet. 13k unread emails = instant anxiety.

To keep a tidy inbox, I aim for Inbox Zero daily. That means for each email:

  1. If there’s a task that can be done in a minute, I’ll do it immediately and archive it.

  2. If there’s a task to be done today, I’ll add it to my to-do list and then snooze the email.

  3. If the task isn’t urgent, I’ll just snooze it to whenever I can/need to do it.

Much better!

I don’t always achieve an empty inbox following this approach, especially when a lot of things are happening at once. The goal may also not always be to clear all emails, if you need some handy for your task for example.

Though I tried to keep my approach lightweight, there’s definitely room for improvement. For example, I’m still experimenting to find a good to-do list workflow. I could be more disciplined about when I check my email to avoid interruptions in my work. So far, though, this method is pretty effective in helping me stay organized.

Tags: productivity

Setting up TeX math rendering for your blog or website

By Thomas Weng on April 26, 2018
~1 min. read

Setting up \(\TeX\)math typesetting on your website is one of those tasks that can seem really difficult if you don’t know what to look for. Here’s a simple way to do it.

I used Khan Academy’s KaTeX typesetting library for my blog. KaTeX is fast, self-contained, and works largely as you would expect. Here are the instructions:

  1. Include KaTeX on your site by adding the required reference tags and scripts to your html template1. See this commit for the changes I made to get it working on this blog.

  2. Typeset math by enclosing your notation within \\( and \\) for inline typesetting, or \\[ and \\] for typesetting on a separate line.

    For example, with inline typesetting, \\(\alpha\\), becomes \(\alpha\). With non-inline typesetting, \\[x^2 + y^2 + z^2 = r^2\\] becomes: \[x^2 + y^2 + z^2 = r^2\]

  3. If you have any rendering issues, check your console for error messages. Also take a look at the full documentation on Github.


Footnotes

  1. You can also download these files and host them on your server directly instead of getting them from the cdn. 

Tags: blogging

Automating C++ builds in ROS

By Thomas Weng on September 9, 2017
~3 min. read

If you’re working on a C++ ROS project, you probably run catkin build every time you make a change. This is tedious and takes you out of your programming flow. It’s especially annoying when your build fails multiple times due to small errors. I’m a big proponent of keeping the iteration loop as small as possible.1

To fix this, I’ve automated the build process to build when saving a file! No more manual building :).

Here’s how it works. I’ve written a shell script called builder.sh that kicks off a build for you every time you save a file in your source directories. If the build fails, it will output the error. If the build succeeds, it’ll print a success message. Here’s an example of a build failure, followed by success:

$ bash builder.sh
Setting up watches.
Watches established.
octomapper.cpp modified, rebuilding...
_______________________________________________________________________________
Errors     << perception:make /home/tweng/catkin_ws/logs/perception/build.make.1447.log
/home/tweng/catkin_ws/src/ros-project/src/perception/src/octomapper.cpp: In member function ‘void perception::Octomapper::publish_octomap(octomap::OcTree*)’:
/home/tweng/catkin_ws/src/ros-project/src/perception/src/octomapper.cpp:99:3: error: ‘pub’ was not declared in this scope
   pub.publish(octomap_msg);
   ^
make[2]: *** [CMakeFiles/perception_octomapper.dir/src/octomapper.cpp.o] Error 1
make[1]: *** [CMakeFiles/perception_octomapper.dir/all] Error 2
make: *** [all] Error 2
cd /home/tweng/catkin_ws/build/perception; catkin build --get-env perception | catkin env -si  /usr/bin/make --jobserver-fds=6,7 -j; cd -
...............................................................................
Failed     << perception:make           [ Exited with code 2 ]

There is syntax highlighting in your terminal which makes this output more readable.

After fixing the issue and saving, the build runs again automatically:

octomapper.cpp modified, rebuilding...
[build] Summary: All 2 packages succeeded!

It’s fairly simple to get this set up for your workspace. You’ll need to:

  1. Get the script from this Github gist: builder.sh
  2. Configure it to watch your workspace directories
  3. Run it in a terminal using bash builder.sh
  4. Start coding and enjoying ~build-on-save~

But wait, there’s more: roslaunch auto-restart!

After your build completes, you’ll probably need to run or restart your ROS nodes to test your changes. That’s another manual step we can automate.

This time, a script called launcher.sh runs your project’s roslaunch command and listens periodically to make sure your ROS nodes are alive. As you make changes and get a successful build, builder.sh – the original script – sends a signal to kill your ROS nodes.2 When the ROS nodes die, launcher.sh will automatically restart them, grabbing your newest build. Here’s an example of what restarting looks like:

$ bash launcher.sh
Launching roslaunch
... logging to /home/tweng/.ros/log/3674ab20-73be-11e7-b57f-b8ca3ab4b589/roslaunch-silverarm-15112.log
Checking log directory for disk usage. This may take awhile.
Press Ctrl-C to interrupt
Done checking log file disk usage. Usage is <1GB.

started roslaunch server http://localhost:39545/

...

/process_cloud_main shutdownCallback:163: Shutdown request received.
/process_cloud_main shutdownCallback:164: Reason given for shutdown: [user request]
================================================================================REQUIRED process [process_cloud_main-1] has died!
process has finished cleanly
log file: /home/tweng/.ros/log/3674ab20-73be-11e7-b57f-b8ca3ab4b589/process_cloud_main-1*.log
Initiating shutdown!
================================================================================
[publish_saved_cloud-3] killing on exit
[person_broadcaster-2] killing on exit
[process_cloud_main-1] killing on exit
shutting down processing monitor...
... shutting down processing monitor complete
done

launcher.sh notices that the node has gone down and triggers a restart:

Launching roslaunch
... logging to /home/tweng/.ros/log/3674ab20-73be-11e7-b57f-b8ca3ab4b589/roslaunch-silverarm-30141.log
Checking log directory for disk usage. This may take awhile.
Press Ctrl-C to interrupt
Done checking log file disk usage. Usage is <1GB.

started roslaunch server http://localhost:34414/

You can get launcher.sh here. You’d run it in a terminal (bash launcher.sh), just like the first one.

If your builds take a lot of processing power and/or take a long time, you may need to make adjustments to this script. I personally haven’t had any problems rebuilding on every save. One option if you do have problems is to rebuild only the package you are working on, and not the whole workspace.

Hope this helps and you find it useful!


Footnotes

  1. Originally inspired by Brett Victor’s talk, “Inventing on Principle.” Check it out a recording of it here: video link

  2. I set the main node with the required=true attribute in my launch file so I only need to kill that node to stop the others. 

How I Journal

By Thomas Weng on May 30, 2017
~3 min. read

Can you remember, off the top of your head, what you were doing at this date and time two months ago? What about just two weekends ago? It is surprising to me how rarely people journal when our memories are so ephemeral. We have new thoughts, experiences, and conversations every day, yet we save and reflect on so few of them.

Journaling is one effective way to take control of your life and memories. Although taking photos and videos are more common ways to keep track of what you do or see, I’ve found writing to be more effective when it comes to reflecting on my life and staying organized.

Forming habits

People I’ve spoken to on this subject are generally receptive to the concept of journaling, but many find it difficult to prioritize the activity and keep a routine. I personally journal about once a week, filling in several days at a time. After a few months, it’s fulfilling to go back and revisit old entries. It’s amazing how a few short sentences can bring you back to an amazing conversation with a close friend, or your mood on a sunny, relaxing day, for example.

For me, one of the biggest starting hurdles was choosing the proper journaling medium. There are countless apps out there, but many of them have inconvenient tradeoffs. Apps often make it difficult to export your data, get in your way with ads, or keep useful features behind paywalls. There’s always pen and paper, but while writing by hand can be relaxing, it is also slower than typing, difficult to search through, and hard to preserve through the years.

Journaling in Markdown

My solution for the past year and a half has been to journal digitally in Markdown files. Markdown is designed to be easy-to-read, easy-to-write, and it avoids the pitfalls I mentioned above. Here’s a example of how I journal, albeit somewhat contrived and with less detail:


## Mon 29
* __exercise__ 7 minute workout
* Skyped with X. It was the first time we caught up in a while! We talked about our living situations, our jobs, and what we've been spending our spare time doing these past few months.
* Met up with Y at Cafe Cesura. Worked on a blog post about journaling.

Which converts into the following HTML:


Mon 29

  • exercise 7 minute workout
  • Skyped with X. It was the first time we caught up in a while! We talked about our living situations, our jobs, and what we’ve been spending our spare time doing these past few months.
  • Met up with Y. at Cafe Cesura. Worked on a blog post about journaling.

Markdown’s lightweight structure provides both organization and flexibility. I generally use headers for dates, followed by bullet points describing each significant event of the day. I keep each month in a separate file, and each year of files in a distinct folder.

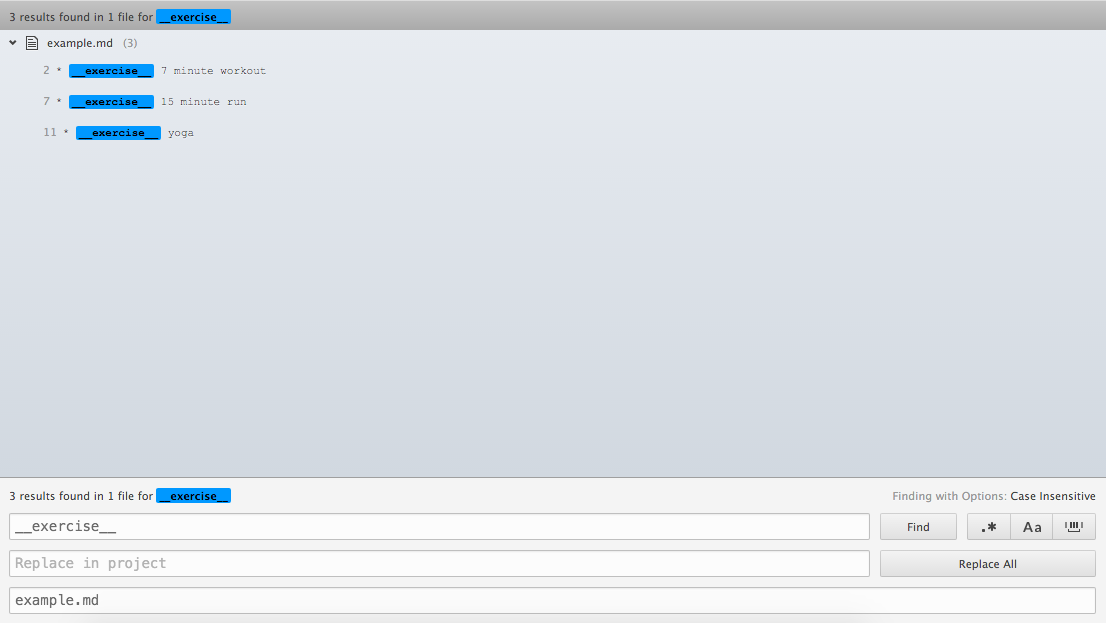
I also use tags like __exercise__ above to mark certain categories of events or thoughts. This has an added benefit of being easily searchable in Atom, my text editor of choice for journaling.


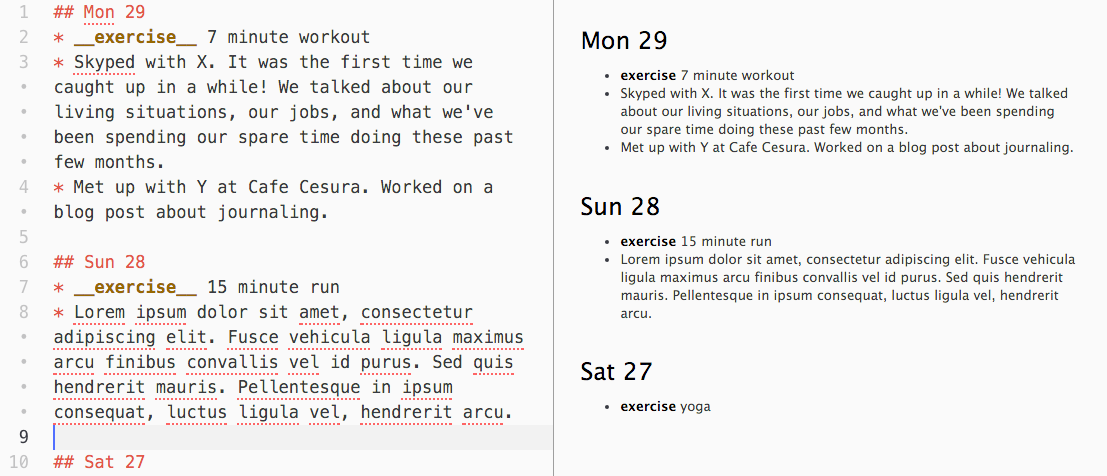
Atom also provides a handy Markdown preview:


Using Markdown, I can write faster than on paper, search through my notes quickly, and save backup copies easily. I don’t have to rely on any apps, nor give any third parties ownership of my data.

A year and a half of Markdown

As I mentioned earlier, I’ve been journaling in markdown for the past 1.5 years, and I’m really enjoying the setup. I journal approximately once a week, but I’ve been trying to increase the frequency. The amount of information I retain about a particular day significantly diminishes by the third passing day.

Perspectives on time and value

Journaling has given me a much better higher-level understanding of where my time goes and more importantly, what I value. Keeping the one folder per year structure I have now, I’ll have 60 folders of journal files, give or take, by the end of my life. That’s not a lot, all things considered, and made me think about what I want to accomplish and record in my lifetime.

Handwritten notes are still cool

Digital journaling hasn’t completely replaced pen and paper. I still take handwritten notes in pocket notepads to remember things to do, books to read, or random thoughts. More often than not, I’ll transfer the interesting portions into my journal.

What’s next

There are other sources of data besides journaling that I want to pull together to form a richer picture. Photos, calendars, conversations, and geotags would add a lot of context to my journal.

To this end, I started writing a parser in Python for the Markdown-generated HTML files. The output is a Python object, which I can work with programmatically. As an example use case, I’ll be able to match up a given date with photos taken on that date in Google Photos. Ultimately, I hope to put together a simple webpage to show what I was up to on a given date in every year of my life.

If you liked this post, you may also like this one I wrote on how I keep a calendar.

Getting Started with Tensorflow

By Thomas Weng on February 10, 2017
~1 min. read

I took some time out this past weekend to work through an introductory machine learning talk on building models using Tensorflow. Within a few hours, I coded up a model classifying handwritten digits from the MNIST dataset with 99.5% accuracy! Considering that the accuracy of cutting edge research models currently hover at around 99.7%, my model was a pretty good result for just a few hours of development.

The resource I relied on to ramp up was Google’s crash course through Tensorflow, presented by Martin Gorner at Devoxx. The talk starts with a simple one-layer neural network, building quickly into multi-layer neural nets, convolutional neural nets, recurrent neural nets, and a collection of optimization techniques (e.g. learning rate decay, dropout, batch normalization).

I took the time to write out the code and get things working on my machine. That took longer than simply watching the video, but it deepened my understanding and guaranteed that I didn’t gloss over any important details. The slides from the talk included most of the code required for the models, but I did need to fill in some of the gaps. When I got stuck, I referenced the complete model at the Github repo Gorner created for this talk.

Gorner’s presentation glosses over the math behind concepts presented in order to focus on model building. I think this was a smart tradeoff. Having spent quite a bit of time taking courses and learning the math powering machine learning, the details of how the math works would probably be too involved for a short talk. And when it comes to actually building models, Tensorflow does the heavy lifting and abstracts the mathematical details away anyway.

Of course, the math does become more relevant as one continues working with ML. I’m sure I wouldn’t have picked things up so quickly with Tensorflow had I not already studied the background concepts.

I’m looking forward to playing more with Tensorflow and learning about what’s going on under the hood. I’ll be keeping up with the math through online resources – courses, textbooks, and hopefully papers. Most of all, I’m excited to take the training wheels off soon and start building my own models from scratch!