Replacing my command prompt with emoji

By Thomas Weng on November 26, 2019

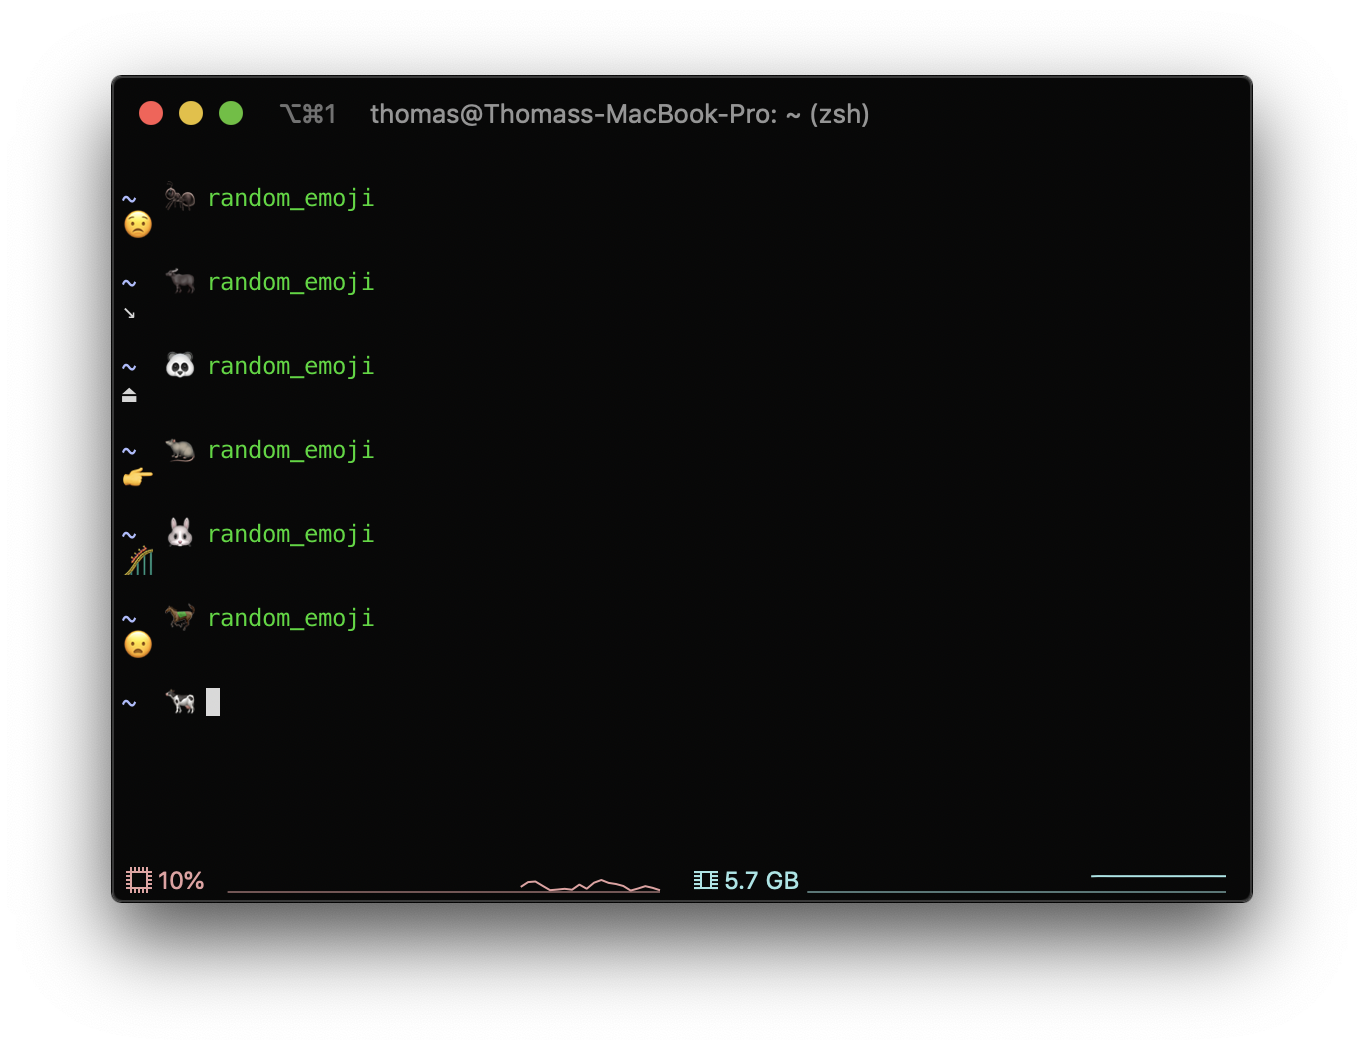
The title says it all:

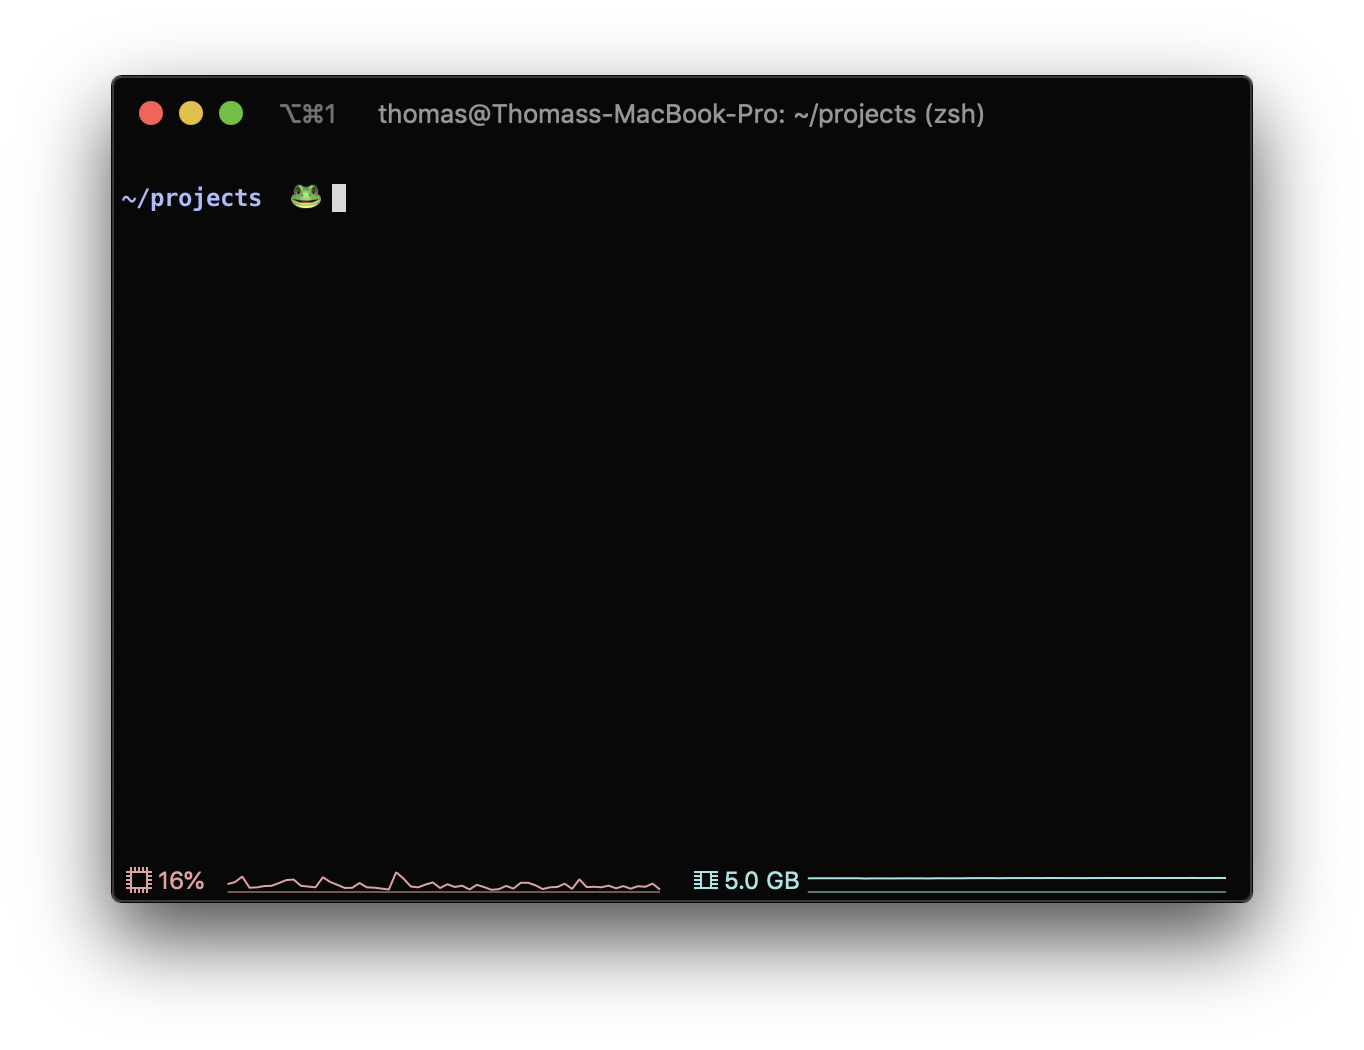
My new emojified command prompt

Why did I do this? Wanted to see if it was possible. And seeing emoji somehow brings me a lot of joy.

I did this on my Mac with zsh and Oh My Zsh. Here are the steps if you want to do the same in your own terminal.

1. In your .zshrc, add the emoji plugin to the list of plugins.

plugins=(
  git alias-tips autojump emoji
)

2. In your zsh theme, update the PROMPT variable.

You’ll find the name of your current theme in your .zshrc file. The file for that theme is under /.oh-my-zsh/themes/.

In my theme file, I replaced > with $(random_emoji animals), which loads a random animal emoji as my terminal prompt each time I open a new terminal. Other options are available in the emoji plugin documentation.

# Old prompt
PROMPT='
${_current_dir}$(git_prompt_info) %{$fg[$CARETCOLOR]%}>%{$resetcolor%} '
# New prompt
PROMPT='
${_current_dir}$(git_prompt_info) %{$fg[$CARETCOLOR]%}$(random_emoji animals)%{$resetcolor%} '

To see changes, reload zsh with source ~/.zshrc or open and close the terminal.

3. Change the command prompt emoji with the random_emoji command

Step 2 replaces your prompt with a random emoji for each new terminal. If you get tired of the current emoji, you can change it with the command random_emoji. It outputs a random emoji and also randomly changes the emoji of your prompt.

Change the command prompt emoji with `random_emoji`

Enjoy!

How to install ROS drivers for Azure Kinect on Ubuntu 16.04

By Thomas Weng on August 31, 2019

Update: see this Google Doc for the most up-to-date instructions on setting up Azure Kinect ROS drivers on Ubuntu 16.04. Many thanks to Sarthak Shetty, Kevin Zhang, and Jamie Chen for updating the instructions!

Following up from my previous post on installing the Azure Kinect SDK on Ubuntu 16.04, this post provides instructions for setting up ROS drivers for the Azure Kinect. These instructions apply for ROS kinetic and Ubuntu 16.04.

Installation steps

  1. Install the Azure Kinect SDK executables on your path so they can be found by ROS.
    $ cd path/to/Azure-Kinect-Sensor-SDK/build
    $ sudo ninja install
    
  2. Clone the official ROS driver into a catkin workspace.1
    $ cd catkin_ws/src
    $ git clone https://github.com/microsoft/Azure_Kinect_ROS_Driver.git
    
  3. Make minor edits to the codebase. If you were to build the workspace now, you would get errors relating to std::atomic syntax.

    To fix this, open <repo>/include/azure_kinect_ros_driver/k4a_ros_device.h and convert all instances of std::atomic_TYPE type declarations to std::atomic<TYPE>. Below is a diff of the edits I made.

    @@ -117,11 +117,11 @@ class K4AROSDevice
      volatile bool running_;
     
      // Last capture timestamp for synchronizing playback capture and imu thread
           -    std::atomic_int64_t last_capture_time_usec_;
           +    std::atomic<int64_t> last_capture_time_usec_;
     
      // Last imu timestamp for synchronizing playback capture and imu thread
           -    std::atomic_uint64_t last_imu_time_usec_;
           -    std::atomic_bool imu_stream_end_of_file_;
           +    std::atomic<uint64_t> last_imu_time_usec_;
           +    std::atomic<bool> imu_stream_end_of_file_;
     
      // Threads
      std::thread frame_publisher_thread_;
    
  4. Build the catkin workspace with either catkin_make or catkin build.

  5. Copy the libdepthengine and libstdc++ binaries that you placed in the Azure_Kinect_SDK/build/bin folder from my previous post in your catkin workspace.
    $ cp path/to/Azure_Kinect_SDK/build/bin/libdepthengine.so.1.0 path/to/catkin_ws/devel/lib/
    $ cp path/to/Azure_Kinect_SDK/build/bin/libstdc++.so.6 path/to/catkin_ws/devel/lib/
    

    You will have to do this whenever you do a clean build of your workspace.

  6. Copy udev rules from the ROS driver repo to your machine.
    $ cp /path/to/Azure_Kinect_ROS_Driver/scripts/99-k4a.rules /etc/udev/rules.d/
    

    Unplug and replug your sensor into the machine after copying the file over.

  7. Source your built workspace and launch the driver.
    $ source path/to/catkin_ws/devel/setup.bash
    $ roslaunch azure_kinect_ros_driver driver.launch
    

    Note that there are parameters you can adjust in the driver launch file, e.g. FPS, resolution, etc.

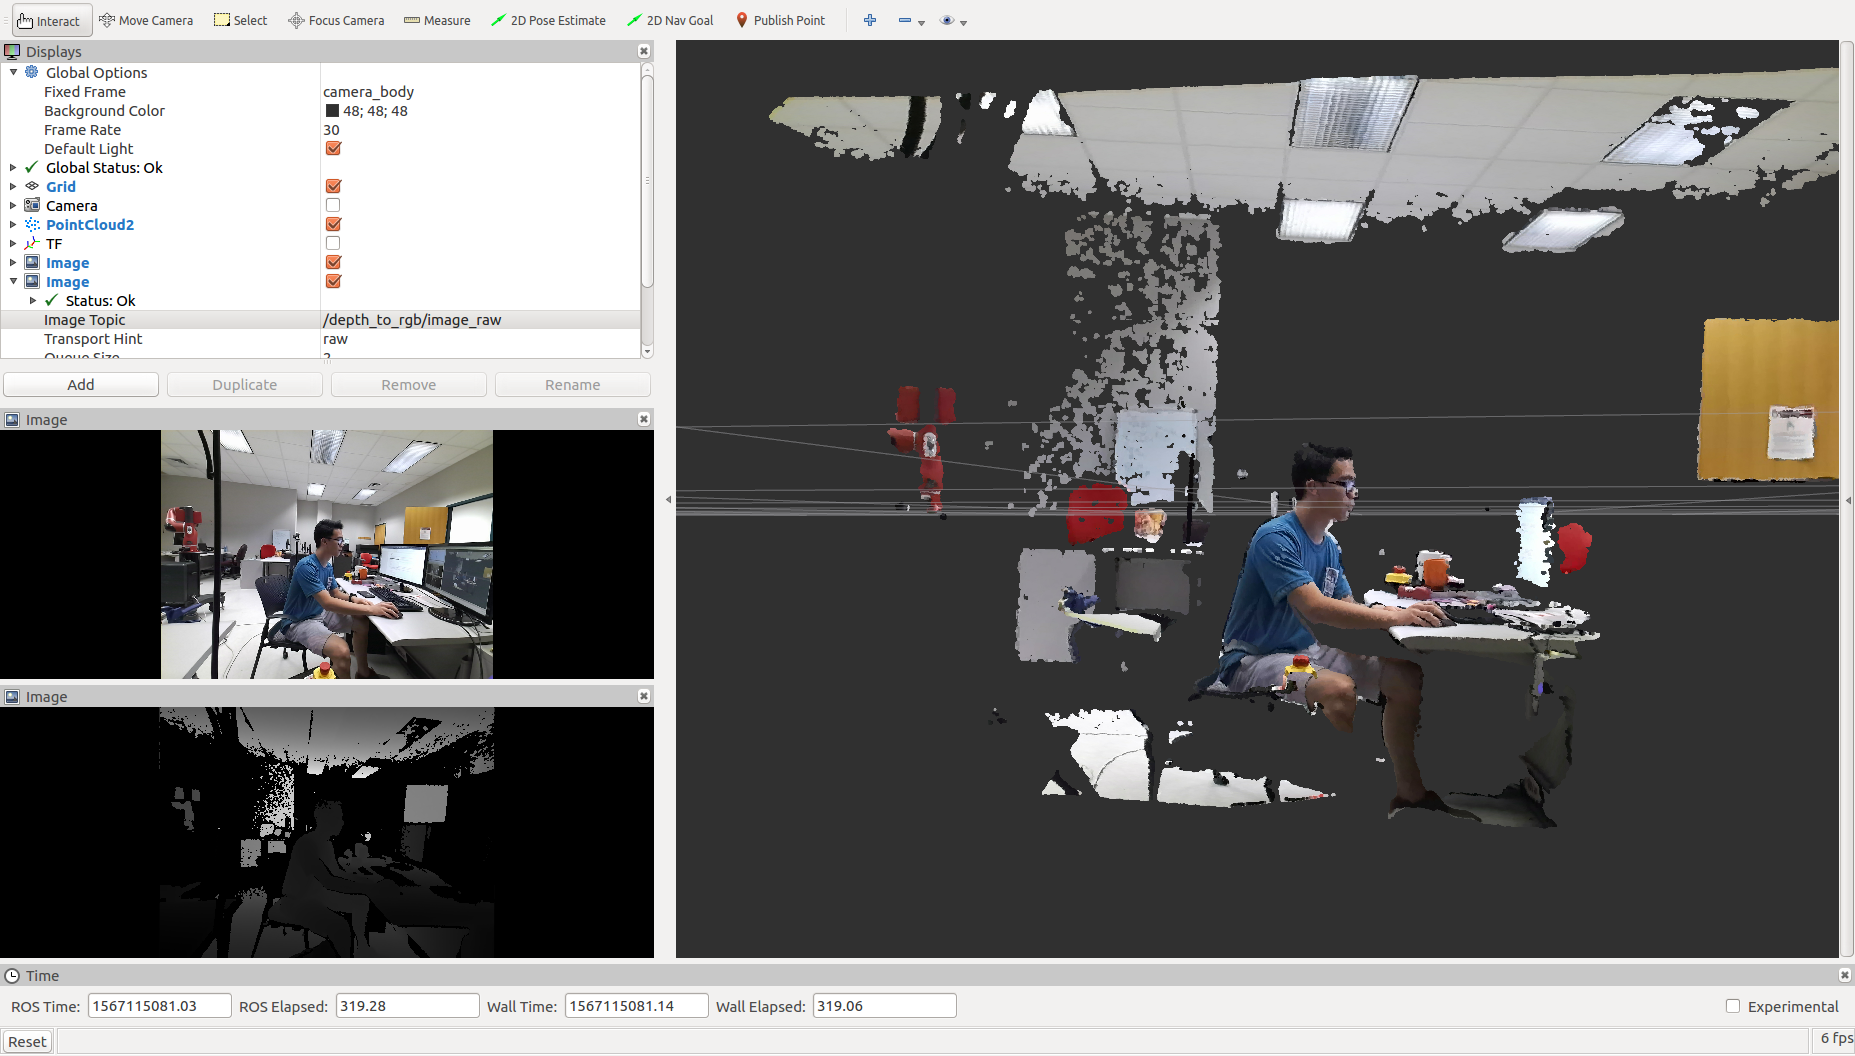
  8. Run Rviz and you should be able to open Image and PointCloud2 widgets that read topics from the sensor!
Screenshot from RViz

Footnotes

  1. I used commit be9a528ddac3f9a494045b7acd76b7b32bd17105, but a later commit may work. 

Tags: robotics, how-to

Terminal tips

By Thomas Weng on August 27, 2019

The terminal is an essential tool,1 but also one whose tasks are most easily automated and optimized.

Most of the time spent on the command line is on non-value-adding tasks, like moving files around, executing programs, installing dependencies, and checking system status.2 These tasks are necessary, but do not end up in your final deliverable, i.e. a publication, code, or other project output.

Therefore, you should aim to spend as little time in the terminal as possible, focusing instead on value-adding tasks like writing programs, analyzing data, making visualizations, etc.

Here are some ways to automate or speed up terminal tasks. I’m assuming you use bash, but the items here are applicable to most terminals.

  1. Shorten commands using aliases and scripts
  2. Use reverse-i-search to find past commands
  3. Check system status using htop
  4. Split one terminal into several with tmux
  5. Download files faster using aria2
  6. Set up key-based authentication for ssh and Github
  7. Try out other terminals

1. Shorten commands using aliases and scripts

This one seems obvious, but if you run the same set of commands often, turn them into aliases. I use aliases for computers that I ssh into often, e.g.

#!/bin/bash
alias hostname="ssh <username>@<hostname>"

Another use case is for aliases is to shorten series of commands, like navigating to a directory and running a script.

#!/bin/bash
alias intera="cd ~/catkin_ws && source intera.sh"

If a series of commands is longer or more complicated (e.g. building and running code), it may be better to turn it into a shell script, which will allow you to take advantage of for loops, command line arguments, etc.

2. Use reverse-i-search to find past commands

Related to the first point, avoid typing out commands, especially if you have typed a similar one already. Besides using tab-autocompleting aggressively, I also use reverse-i-search all the time to search my command history. Activate reverse-i-search using Ctrl+r and then type in a query to find matches. Hit Ctrl+r again to find the next match.

Demonstrating reverse-i-search.

3. Check system status using htop

htop is an improved version of the top command, with colors, better navigation, and other features.
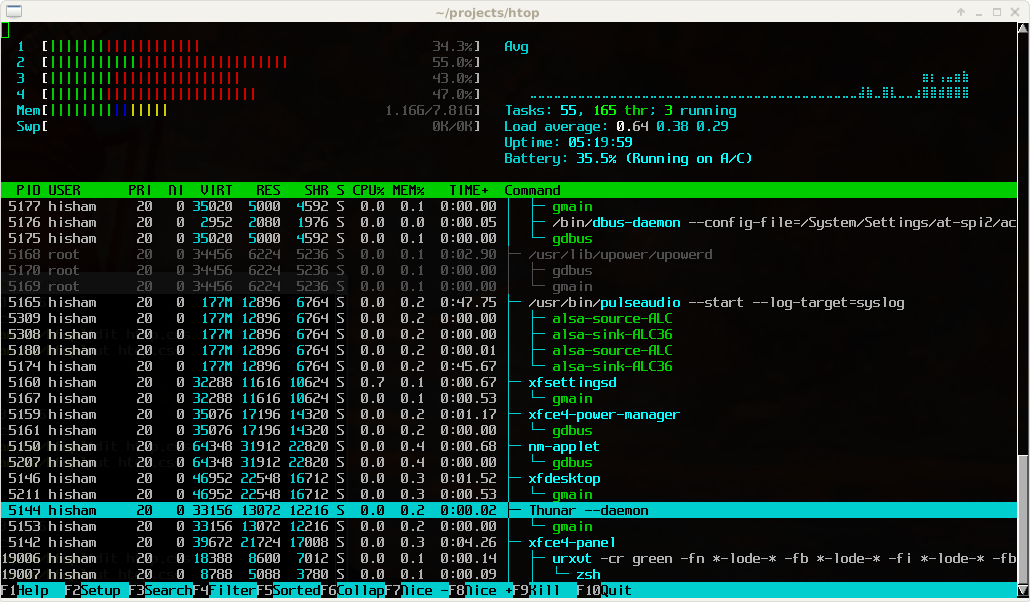
Screenshot of htop.

Besides checking system usage, I also use this to find (F4) and kill (F9) processes as root (sudo htop).

4. Split one terminal into several with tmux

Use tmux to create and switch between multiple terminal panes within one window.

Demonstrating how to split panes with tmux. Note that my keybindings are different from the tmux defaults.

Another benefit to tmux is that these terminals will persist even if your ssh connection drops. Simply run tmux attach after ssh-ing back in to return to your panes.

5. Download files faster using aria2

aria2 is an alternative to wget or curl that parallelizes downloads:

$ aria2c -x8 <URL>

-xN specifies how many connections to open for parallelization.

6. Set up key-based authentication for ssh and Github

Instead of typing your password each time you ssh or push/pull from Github, use key-based authentication. It only takes a few minutes and has the dual benefit of being easier and more secure than password authentication.

To set up key-based authentication for ssh, see this DigitalOcean post: How To Set Up SSH Keys. You’ll need to do this once per computer you want to ssh into. For Github, follow the steps outlined here: Connecting to Github with SSH

7. Try out other terminals

You can also explore beyond bash and try terminals with more features. I use zsh as my default shell with plugins for jumping between directories, better autocomplete, etc. If you’re interested in zsh, check out these articles on how to get started: Articles from the Oh My Zsh wiki.


Many thanks to Cherie Ho for editing this post and introducing me to zsh, Leah Perlmutter for introducing me to reverse-i-search, Rosario Scalise for tmux, and Abhijat Biswas for aria2!

Footnotes
  1. If you’re a beginner with the terminal, this reference from Software Carpentry is a good starting point. 

  2. I consider working in a terminal-based editor like vim different from being on the command line itself. 

How to install the Azure Kinect SDK on Ubuntu 16.04

By Thomas Weng on July 19, 2019

Update: see this Google Doc for the most up-to-date instructions on setting up Azure Kinect ROS drivers on Ubuntu 16.04. Many thanks to Sarthak Shetty, Kevin Zhang, and Jamie Chen for updating the instructions!

Microsoft recently released the Azure Kinect DK sensor, a $399 developer-oriented sensor kit for robotics and mixed reality applications. The kit’s SDK officially supports Windows and Linux 18.04. I’ve managed to get the v1.1 SDK working on Ubuntu 16.04, and have documented the steps below.

Why downgrade to Ubuntu 16.04?

Many of the robots I work with or have worked with are tied to Ubuntu 16.04, e.g. the Rethink Robotics Sawyer robot, as well as the PR2. Upgrading the robot hardware to 18.04 is difficult and would break existing projects. Although upgrading to 18.04 will eventually be necessary, it is helpful to have the Azure Kinect DK working on 16.04 in the meantime.

Installation steps

These steps worked for me on an existing Ubuntu 16.04 installation, not a fresh one, so your mileage may vary.

  1. Download the v1.1 SDK from Github.1
    $ git clone https://github.com/microsoft/Azure-Kinect-Sensor-SDK/tree/release/1.1.x
    
  2. Install dependencies using the provided script.
    $ bash ./Azure-Kinect-Sensor-SDK/scripts/bootstrap-ubuntu.sh
    
  3. Follow the build steps in https://github.com/microsoft/Azure-Kinect-Sensor-SDK/blob/release/1.1.x/docs/building.md.
    • If you get a CMake error, you may need to upgrade CMake2.
      % Download and extract cmake 3.14.5
      $ mkdir ~/temp
      $ cd ~/temp
      $ wget https://cmake.org/files/v3.14/cmake-3.14.5.tar.gz
      $ tar -xzvf cmake-3.14.5.tar.gz
      $ cd cmake-3.14.5/
      
      % Install extracted source
      $ ./bootstrap
      $ make -j4
      $ sudo make install
      $ cmake --version
      
    • If you get a libsoundio error, you may need to install jack-tools.
      $ sudo apt-get install jack-tools
      
  4. Get a copy of the depthengine binary libdepthengine.so.1.0 and missing dependencies

    libdepthengine.so.1.0 is closed-source code for processing the raw depth stream from the camera. This binary is included as part of k4a-tools, the Azure Kinect SDK Debian package for Ubuntu 18.04.

    As a result, you’ll need to install k4a-tools on an Ubuntu 18.04 OS following these instructions, then copy the files installed into /usr/local/lib/x86_64-linux-gnu onto your Ubuntu 16.04 OS.3

    In practice, I found that I only needed libdepthengine.so.1.0 and libstdc++.so.6 from the x86_64-linux-gnu folder.

  5. Copy the depthengine binary and missing dependencies into the bin/ folder generated by the build in step 3.
    $ cp path/to/x86_64-linux-gnu/libdepthengine.so.1.0 path/to/Azure-Kinect-Sensor-SDK/build/bin/libdepthengine.so.1.0
    $ cp path/to/x86_64-linux-gnu/libstdc++.so.6 path/to/Azure-Kinect-Sensor-SDK/build/bin/libstdc++.so.6
    
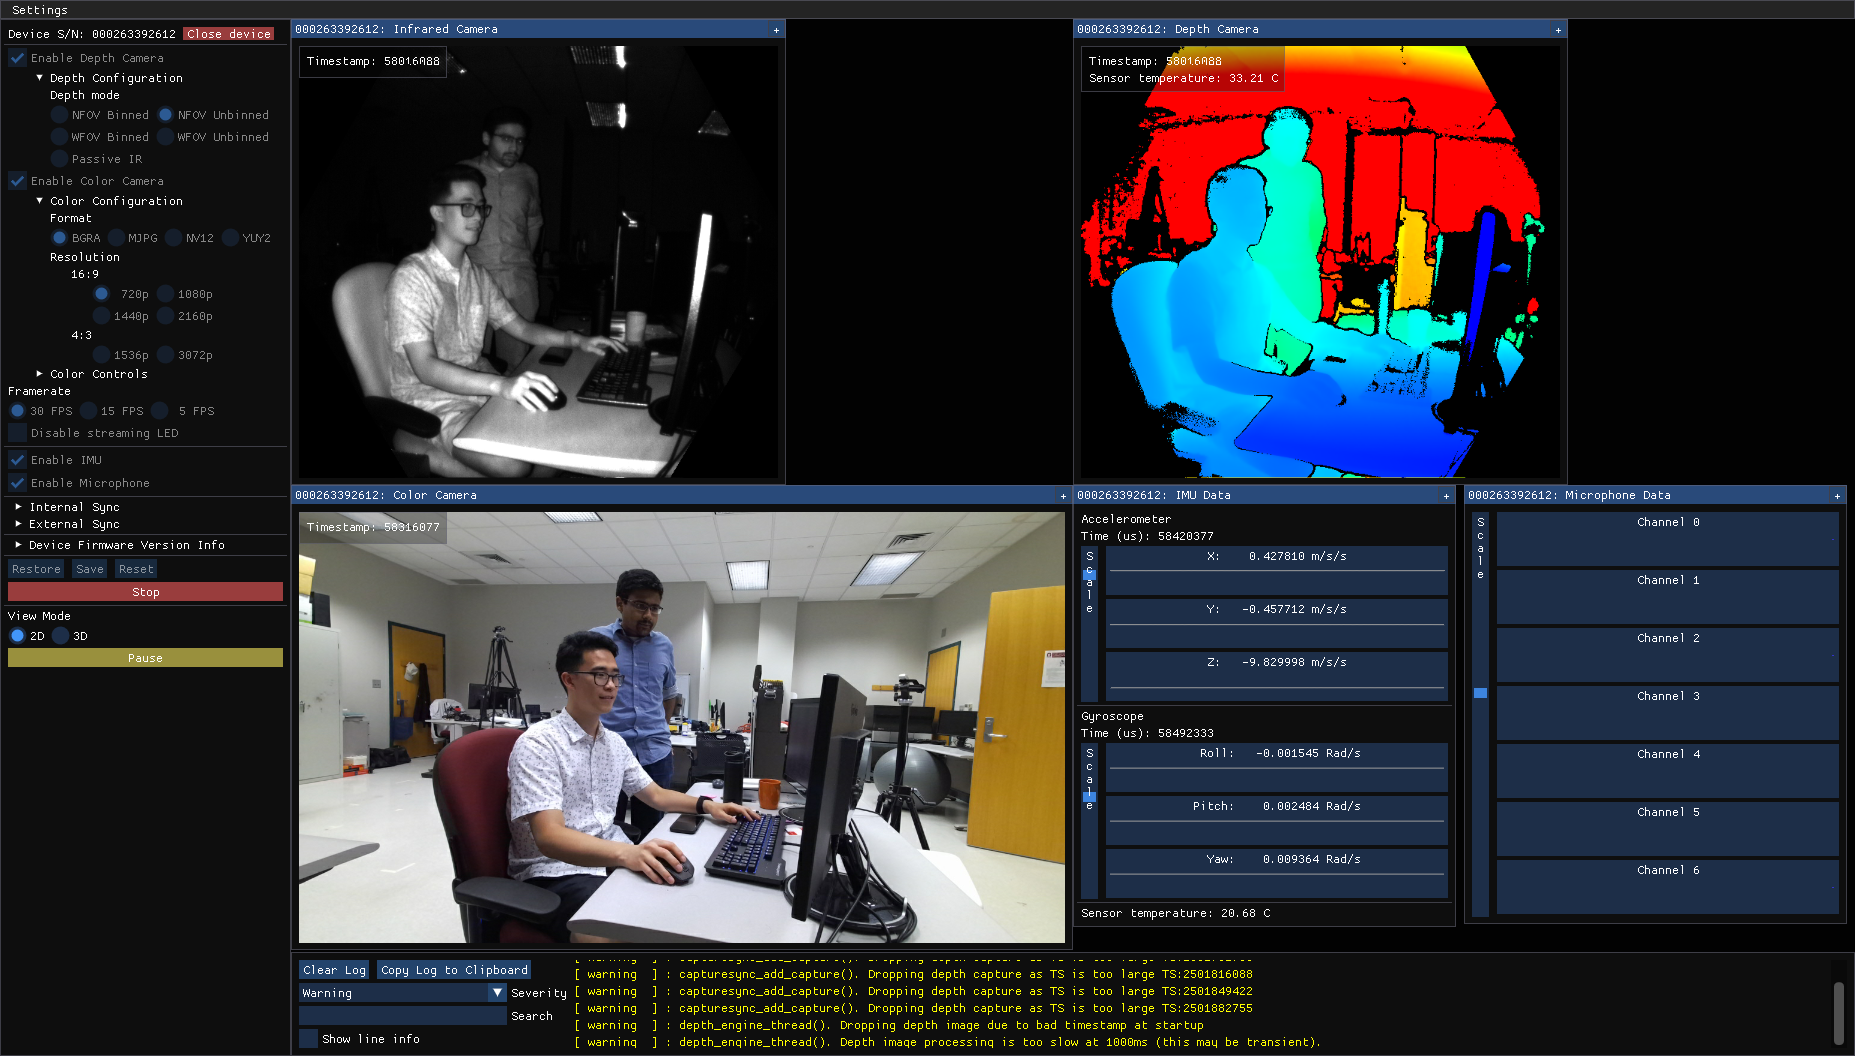
  6. Test the installation by running the SDK viewer.4
    $ sudo path/to/Azure-Kinect-Sensor-SDK/build/bin/k4aviewer
    

    If all went well you be able to open your device and see all data streams coming in as below.

Screenshot from k4aviewer

To integrate the sensor with ROS, take a look at my follow-up post: How to install ROS drivers for Azure Kinect on Ubuntu 16.04


Footnotes

  1. I used commit fd6f537bb5ad9960faafc80a3cededbc8eb68609, but a later commit may work. 

  2. https://askubuntu.com/questions/355565/how-do-i-install-the-latest-version-of-cmake-from-the-command-line 

  3. Or find a friend who has a copy :) 

  4. There are instructions for running the viewer as non-root here 

Tags: robotics

Using my calendar as a time log

By Thomas Weng on January 5, 2019
~4 min. read

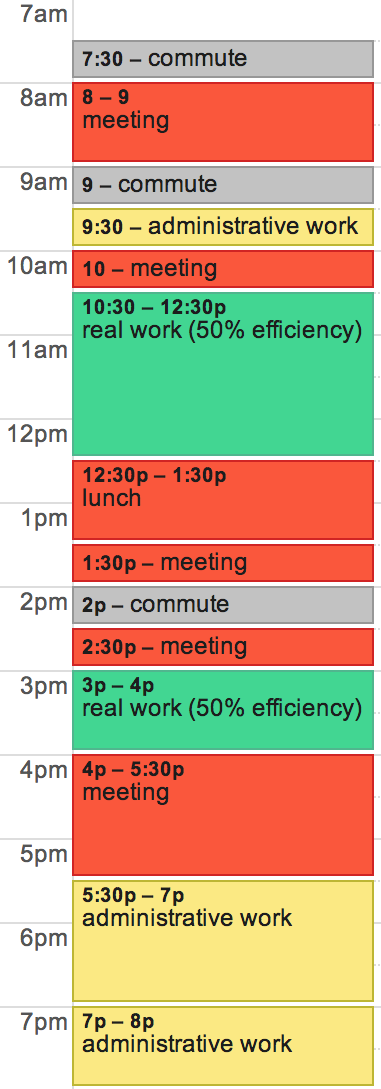
I used to only use my calendar to track upcoming meetings. But then I read Philip Guo’s blog post on time management, and was fascinated by how he used his calendar to show where his time went.

The color-coding makes it easy to review at a glance.

I decided to try Philip’s calendaring method to see if I was being as productive as I thought. It’s been over a year since I started logging, and I have found it to be great not only for gauging my past productivity, but also for kickstarting changes to how I spend time going forward.

In the rest of this post, I’ll describe how I log my time and talk about the insights I’ve gained in more detail.

Logging is simple and flexible

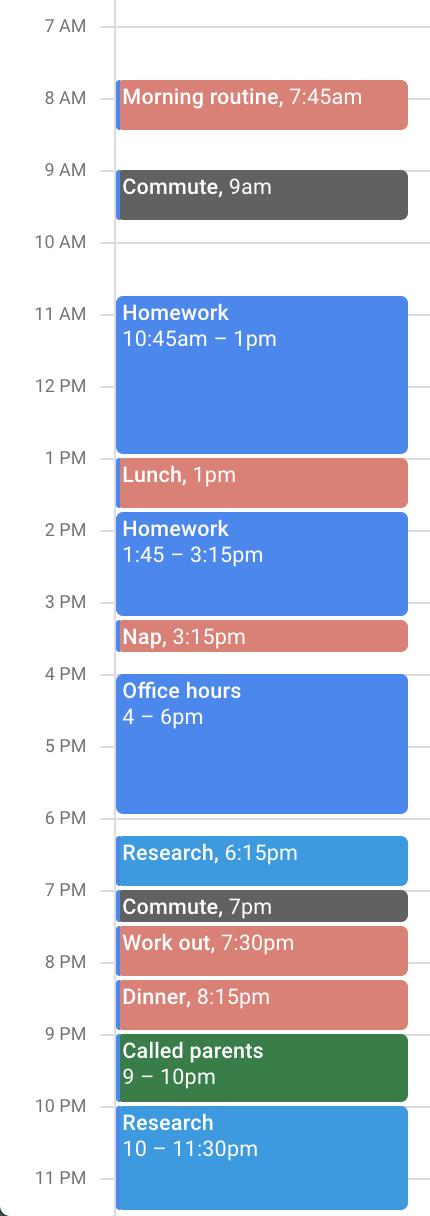
There’s not much to it—after working on a task, I create a calendar entry for the time spent and color-code it. I use Google calendar, but any kind of calendar works. Here is an example of what one of my recent work days looks like.

Had a slow morning and missed my bus...didn't want to spend more time looking for an ~ideal~ day

I’ve color-coded the activities as follows:

Pink Health
Grey Travel
Blue Coursework
Cyan Research
Green Social and Family

The system is very flexible. You can use whatever color categories suit you best. Your labels for each activity can be as simple or as descriptive as you like. You can even adapt it for a productivity methodology like David Allen’s Getting Things Done or Cal Newport’s Deep Work. Cal Newport even describes a similar method of logging your time.

Logging shows me where my time goes and how to adjust

Since I started using this method, I have a better sense of how I’m spending my time compared to when I relied on my intuition. I’m able to catch patterns of behavior and reinforce them if they are positive, or work on eliminating them if they are negative. For example, I’ve noticed that my energy and focus dips in late afternoon before returning in the evening. Taking a break from work to nap or exercise helps me get through the slump.

I also have a better sense of the present. Logging each task helps me be more deliberate about each activity I start, and makes me aware of deviations from my planned schedule quickly, so that I don’t reach the end of the day and realize too late that I went off track.

Some may think it takes a lot of work to log time like this, but it really doesn’t take long. To me, the benefit of having a better handle on my time is worth the few moments it takes to do the logging.

Some final notes

  • If there are events that fit into multiple categories, I don’t worry too much about it and just pick one.
  • I work in thirty minute chunks, so I set the default event duration in Google calendar to thirty minutes instead of an hour.
  • I also generally try not to have overlapping things in my calendar. If there are conflicting events, I will cancel my appointment with the less important one and move it off my calendar or gray it out. I can’t be in two places at the same time anyway.
  • Unlike Philip Guo, I don’t keep track of my efficiency level for each task. I found it both difficult and distracting to assess how efficient I was.
  • In a way, this is similar to the post I wrote about how I journal in that it’s about recording things. When I started using this calendar, I stopped journaling my day-to-day items in as much detail because the calendar serves that purpose now. But I’ll still put my thoughts and feelings in my journal.

Many thanks to Cherie Ho and Ada Taylor for reviewing this post!

Tags: productivity